How to make a Memory Wire Bracelet

Tools and Materials needed:
Memory Wire
Selection of beads that fit onto the wire
Memory Wire Cutters (Don't use normal cutters or flush cutters as they could be damaged by the wire)
Memory Wire Pliers (or Bail Making pliers)
Flat or Chain Nose Pliers
(Optional) Headpins
(Optional) Round Nose Pliers if using Headpins
Memory Wire is a preformed toughened coil of wire that has a memory, meaning it will retain its shape. Follow these simple steps to make a bracelet that's sure to bring a smile to your face
Step 1

Step 1: Separate 3 - 5 coils of wire from the main coil, and using Memory Wire Cutters snip off your section. Don’t be tempted to use flush cutters as they will be damaged by this toughened wire. Ideally, you want three full coils plus enough extra on each side to meet together near the front of your wrist
Step 2

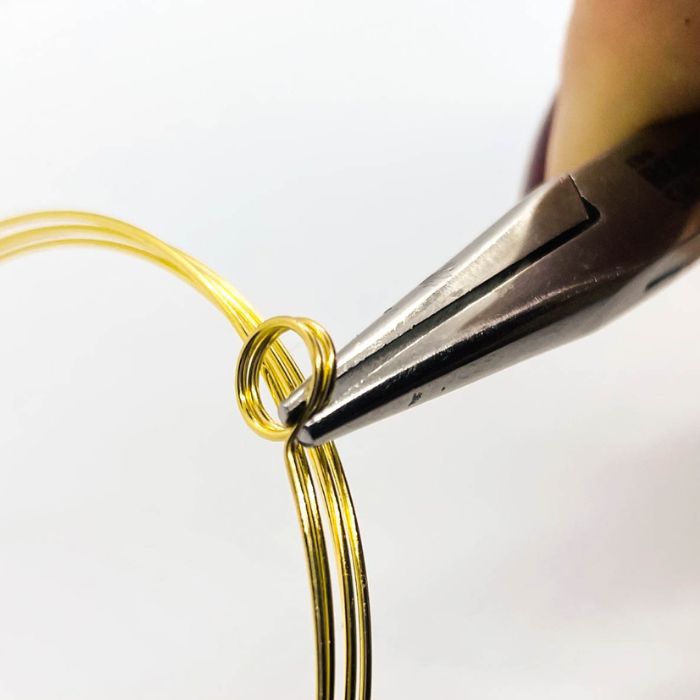
Step 2: Using Memory Wire pliers, clamp hold of the tip of the wire
Step 3

Step 3: Following the natural curve of the wire, create a double loop with the pliers so that the tip of the wire ends up next to the main coil of wire, it will look like a 'P' shape
Step 4

Step 4: Using Flat/Chain Nose Pliers, clamp hold of the loops at the point where they join the main coil, then bend it back to centralise it
Step 5

Step 5: Thread on your chosen selection of beads and make sure you push them all the way down to the looped end so that the wire coil is completely hidden. When all the beads are on, leave approx 1 inch clear at the end so you have space to create another loop
Step 6

Step 6: Repeat steps 2 to 4 to make a centralised double loop at the end securing the beads in place. (Alternatively you could glue on half drilled beads at either end instead of loops)
Step 7

Step 7: As an optional extra, you could create wrapped loops and attach them at either end of the bracelet to add embellishment
Step 8

Step 8: Remember to hook them onto the bracelet loop before doing the wrapping! Don't worry too much if you forget though, you can always use a jump ring to attach it instead.
Where can I buy Memory Wire tools and materials?
Follow this link to our website and find all the tools and materials you need to make this Rainbow Coloured Memory Wire Bracelet


